Quantcast
Channel: Natholeon's Empires
Viewing all 492 articles
Browse latest View live

And now for something completely different

$
0
0
Last year I bought some 15mm Crimean War figures off Trade Me, the New Zealand equivalent of ebay. They were advertised as Lancashire Games figures, but when I got them they did not match the pictures on the website, although they did have Lancashire Games written on the packaging. I asked Allan at Lancashire Games about them and he confirmed that they are older sculpts. So they are quite slim, and a true 15mm figure unlike the newer figures which are closer to 18mm.
About three battalions worth were already painted, so I thought I'd base them up and finish off the armies. I'm looking at using modified Neil Thomas rules, based on the ones that I used for playing French Revolution games.
My brigade commander talking to one of his Highlander colonels.
A Line battalion. these figures were already painted when I received them.
British Guards. Again, these were mostly already painted, I had to finish another four figures to complete a battalion.
The Gordon Highlanders. These are all my own work. I tried to use the same black line technique as the figures that were already painted so that the whole project is consistent. I think it worked.
A close up of the command element.
The only Russian battalion that I've painted so far.
And a close up of the command to give an idea of my black lining technique.
In the past I've used warflag for my banners, but they didn't have anything for the Crimean War. Never mind, I just used Napoleonic flags instead. I'm not sure how close they are to the flags of 40 years later, but they will do for now.

I have 8 battalions, 2 cavalry units and 2 guns for each side to put together, and that will be the whole project. The Allies have 5 British infantry units (including the Rifle Brigade) and 3 French ones to give me a bit of variety. They are supported by Hussars, Lancers, foot artillery and horse artillery. The Russians have 6 line , 1 jager, and a Siberian rifles unit, supported by hussars, Cossacks and 2 guns.

Today my 15mm Napoleonics turned up from Old Glory 15s. The figures are great and I can't wait to get into them. One can never have too many projects!

Nate

A British Company ready for a South African tour

$
0
0
The latest figures to roll off the production line for Geoff, these are the 10 British figures that I kept back for an IHMN company.
The three characters - 2 officers and a man waving - which means he must be important.
It's hot work under the South African sun.
A couple of lads about to break into 'Men of Harlech'.
And the last three - two bearded types and another loading pose. I don't know why I ended up with two of the same pose, there were plenty of others. I can't have been thinking straight.
I really enjoyed painting these figures. If there had been no Zulus in the Zulu War I may have even seen the project through to fruition... To be fair I did contemplate just doing the 1881 Boer War with British and Boers, and that was probably quite achievable. Never mind, it isn't as if I don't have a whole pile of other projects to get on with.

Nate

Practice German element for the Great War

$
0
0
Seen from the front
Seen from the rear
The problem with painting World War One Germans is the exact nature of the colour of their field grey. I've been trying to work out a combination that works on 15mm figures. The above figures use a combination of Vallejo Dark Sea-green mixed with Brown Violet and then highlighted by adding Sky Grey. I'm trying to get a olive tinge to the grey, without making it too green, but not too grey either. I'm still not sure this has worked. In the past with 28mm figures I've just used Vallejo Grey-green, but I don't think it works at 15mm. I may just have to keep experimenting.

Nate

Not to be a Boer, but...

$
0
0
The last of the companies for IHMN that I've painted for Geoff is these Black Tree Designs Boers.
The full Boer force
Boer command, complete with pinstripe jacket on the man in charge and my attempt at corduroy on the guy in the middle.
A few more Commandos
I like to think the guy in the middle has just left his bank job, thrown on his old brown jacket and taken to the field.
The last three figures, including another corduroy jacket.
These aren't the best of Black Tree's castings that I've painted, but they still turned out rather nice. The limited colour pallet did get a bit 'boering'... I'll get my hat...

Nate

Latest commission work

$
0
0
When I sent Geoff the Zulu Wars figures I let him know that I'd be interested in painting up small groups of figures if he wanted me too. He replied that he did indeed have some figures that he'd like to see painted, and sent me through 30 odd to work on. This is the first group - pulp adventurers from the Copplestone Castings range. These are really nice figures to paint, and I hope he is happy with the result.
The full group.
The archaeologists.
'I hope the opposition don't include mummies...'
Some splendidly adventuresome chaps.
I did take some inspiration for the colours from the Copplestone website, but there are some variations of my own in there.
Time to start on the next group which are some Perry Samurai era villagers. I'd earlier considered the possibility of a small skirmish force for Ronin, so depending on how much I enjoy painting these figures I might head down that route in the near future.
I'm also slowly painting up a secret project which is going to be a gift for a friend. I managed to do quite a bit of work on this in the last two weeks, which is why the blog has been so quiet - can't post piccies or it won't be a secret anymore! Hopefully some Samurai will be ready by next week.

Nate

Two book reviews

$
0
0
Back in July I won a prize from Millsy and Evan's giveaway on their Canister and Grape blog. The prize was a copy of War at sea in the ironclad age and I promised that I would do a review of the book. Well, it is only a couple of months since I finished reading it, so I guess a review is possibly ever so slightly overdue.
Yes, this is exactly the same image I used last time.

This book is part of Cassell's History of Warfare series, of which I already own two other volumes - The Renaissance at War and Warfare in the Eighteenth Century. This is a great series written by some very good historians (Jeremy Black writes the 18th Century volume and it delivers a broad narrative of the period without being Eurocentric), and Ironclad Age is no different. For such a small period of time that the era covers, Richard Hill has written a comprehensive and easily digestible tome here.
One thing upon reading through is that the title of the book is misleading. This is not just a book about war at sea, but the impact that the ironclad age had on military operational strategy. This was the era of 'send a gunboat', and the book reflects this admirably.
The chapters start with the technical background, and this is written in a way that landlubbers like myself have no problem understanding. The technological changes of the nineteenth century had a decisive effect on the way that wars were waged, and it is important to summarise just how revolutionary those changes were.
Next up is navies and their people. This short chapter looks into the personnel who were in charge of the fleets throughout the nineteenth century, and the fashion of a naval career.
Following this is theories of sea-power. This follows the key naval thinking of the era, from British strategy as espoused by John and Philip Colomb - 'the frontier of our empire is the enemies coastline'- to the French jeune ecole , to Alfred Mahan. Tirpitz is considered, and his influence on Wilhelm II. It continues naturally to look at the different approaches of either seeking a decisive battle or of imposing blockades and raiding tactics. Finally it looks at tactical theory and the manoeuvre drills that all went so horribly wrong with the Camperdown in 1893.
The fourth chapter focuses on the American Civil War. To be honest this was a chapter that I thought I would gloss over. It isn't a war that overly interests me and I felt that having read about Hampton Downs once before, I had enough information for my little brain to hold onto. However, I found the chapter really interesting, from the coastal actions and blockades to the Mississippi River campaign it tied up the naval element of the war very succinctly. I guess what I found from this chapter was that I now know more about the American Civil War's naval dimension - probably all that I really need to considering it isn't an area of intense interest for me.
Chapter five is navies and imperial expansion, and this is where this book really comes into its own. Not only do we have naval actions covered, but also the influence of naval personnel and guns on colonial campaigns. One does not normally expect to see a map of the battle of the Modder River in a book with the title 'war at sea' - but it is here along wit hthe siege of Ladysmith because of the involvement of the naval guns in these battles. The Taku forts, gunboats on the Nile in the Sudan, the French in Taiwan, are all covered. There is even mention of the naval brigade and river gunboats in the New Zealand Wars!
Chapter six is the one we have all been waiting for - Fleet Action. Except that there aren't many. Lissa in 1866 is covered and it is interesting to see what an influence commanders can have in pitched naval battles. Von Teggethoff, the Austrian commander was aggressive and dynamic compared to his Italian opposite di Persano, and the result reflects this despite the inferiority of the Austrian fleet. Angamos Point where the Chileans and Peruvians faced off in the War of the Pacific is covered. It is a relatively minor skirmish really, but the results were decisive in terms of Chilean control of the sea and their eventual victory in this war. The same can be said of the battle of Santiago Bay between the US and Spain.
Finally we come to the masters of fleet action in the Ironclad age - the Japanese. The Sino-Japanese War and the battle of the Yalu is covered in depth, as is the Russo-Japanese War with the Battle of the Yellow Sea and Tsushima. The book ends with Tsushima, commenting that the same month HMS Dreadnought was laid down and the Ironclad age was effectively over.
Overall I thoroughly enjoyed this book. Naval warfare is not my forte, but I do love the nineteenth century and War at sea in the ironclad age had me looking around various sites at the possibility of building some ironclad forces to complement a land based project. The Russo-Japanese War, War of the Pacific and Austro-Italian War 1866 are all contenders. Especially given my latest acquisition...
The Battle of Tsushima, just for some inspiration.

I'm a fan of Neil Thomas's wargaming books. His rules are simple, but well thought out. I've used them for ancient games and for Napoleonic games very successfully, although I always tweak them a little, usually with morale and skirmishers. So it was with eager anticipation that I bought a copy of his Wargaming Nineteenth Century Europe 1815-1878.

I bought the Kindle version from Amazon, as the bookshelves are really a bit overloaded at the moment. It is a pity, because there are none of the colour photos (which usually have nothing to do with the rules but always make nice eye-candy) in the Kindle version. What there is is one of the best wargames books I have bought in a long time. 
Neil starts off the book with a survey of the evolution of warfare in the nineteenth century. He then goes on to explain the thinking behind his rules. He consistently harps on about the importance of simple rules that do not detract from the game, and I can imagine that this might annoy some people, but as I agree whole-heartedly with him, I'm not too bothered. What he does do is boil down some key observations of the warfare of the period into some effective and simple rules. Some people might be a bit taken aback by things such as infantry lines that cannot move or units may either move or fire but not combine both, but Neil argues cogently the theory behind these mechanisms.
The rules themselves are simple but effective. The only thing that I don't like about them is the morale rules as I like my units to stagger and then rout when they get into trouble. I find the expedient of removing a base for a failed morale test to be a little too simplistic. I also like to have generals with the ability to rally troops. The other thing I want to take into consideration is the effect of losses on a unit's morale. As a result I have put together a table that gradually decreases morale with every lost element so that the odds of a unit routing when it has only 1 element left are increased. I also like the idea of skirmishers who can form up as close order troops and of being able to add figures to a picquet line from line battalions. As such, my skirmishers are based 2 to a 1/2 base, and one element of the each infantry formation is also based the same way in order for them to join a picquet line if so required by the scenario. I have to emphasise that the picquet rule is a special one which I apply only to certain armies like the British in the Crimea. Neil accounts for skirmishers operating around their parent units in his rules, and I accept his rationale.
Where this book surpasses his previous works is in the scenario sections. There are five general well thought out scenarios that will all give an enjoyable game in any rules system. Then there are the army lists followed by specific scenarios based on historical battles. Unlike previous books there is no attempt to stick to 8 units a side - forces contain anywhere from 13 - 18 different units. I realised that I don't have enough figures to wargame the Alma scenario - is that a sign that more buying must happen? 
The army lists contain special rules - for instance the British can advance in line; the Russians must use column etc. There are also optional command mechanisms to reflect the increased difficulties of battlefield control in this period. All in all, this book is very well thought out.
I bought this book mostly for my Crimean War project, but what I have found is inspiration to delve into other periods. I've always had a soft-spot for the Franco-Prussian War, but at the moment it is the 1866 Seven Weeks War that is really calling to me. I'm not sure if it is the Bohemian theatre or the Italian theatre I find more interesting - maybe I could do both! The other possibility is The War of the Pacific. 
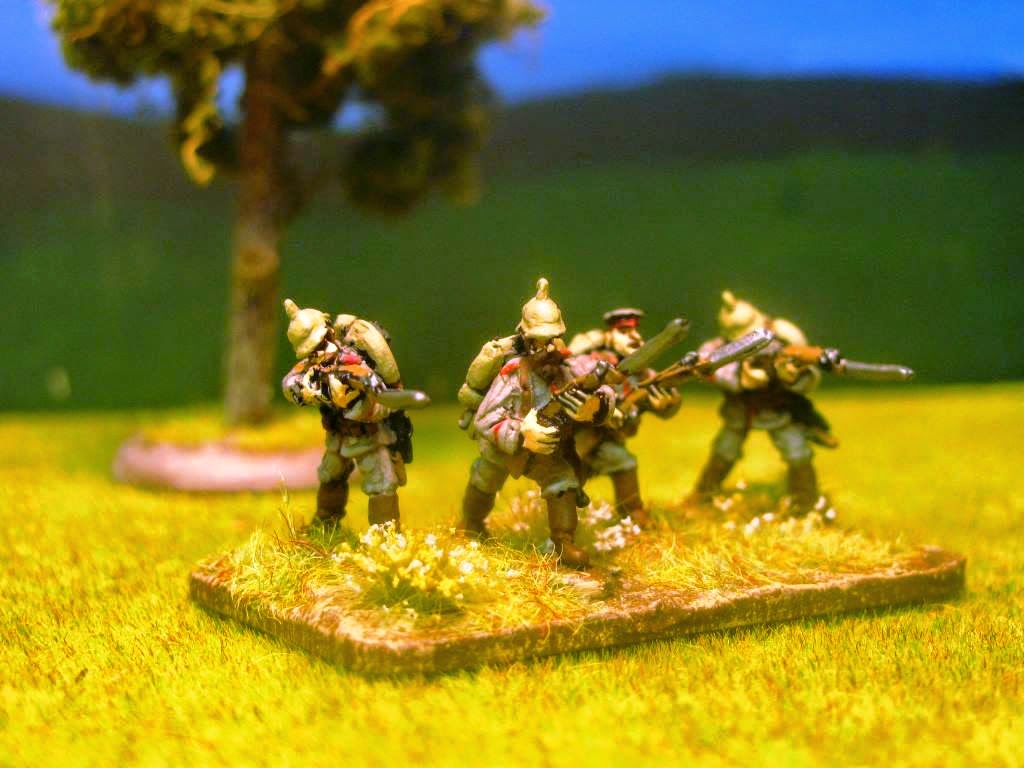
Outpost Wargames do a nice 15mm range for this little known conflict at very reasonable prices.
So here I sit, enthused about the prospects of wargaming nineteenth century (and early Twentieth Century) battles thanks to both of these books. Both are highly recommended.

Nate

Early War arrives

$
0
0
My birthday present arrived three days ago, only three months after the event itself. I was OK with this because it was my preorder for Lancashire Games new early WWI range. I worked out what I would need for a French and a German army for 1914. Initially I had planned to buy the British rather tha nthe French, but after reading Ian Senior's Home before the leaves fall I changed my mind. If you haven't read this book and you enjoy WWI, I heartily recommend it. I borrowed a copy from the library and was so impressed that I ordered the paperback version entitled Invasion 1914 in order to be able to refer to it regularly to devise scenarios.
Anyway, I thought I'd post some pictures of the figures as they are very nice, but they are also very big - 18mm rather than 15mm - and people wondering whether they mix with figures like  Peter Pig might want to have some comparisons.
A base of Lancashire Games WWI Germans Marching next to a base of Battlefront Late War Germans.
Left to right: Battlefront, Lancashire Games, ESCI 1/72 (20mm), Perry Miniatures 28mm
So calling them 15mm is a definite case of scale creep! I'm not perturbed though, as I had not planned to mix these figures with any other companies. The Marlburians that I painted were of the same scale, and it made them very easy (and enjoyable) to paint.
Lancashire French Dragoons on the left, my 15mm Crimean Cossacks on the right.
The same sizing is true for the cavalry, which is just as well, or the horses might look a bit silly next to the infantry. I am really impressed with the cavalry figures - the ones with the upright lances are particularly well molded with virtually no flash in he difficult area between the lance and the trooper's leg.
An example of the German artillery and 77mm field piece
The artillery is of the same scale. The gun sculpts are utilitarian rather than excessively detailed. For instance, the seats on the gun shield of the 77mm are not sculpted. They come in three pieces - the gun and carriage are one sculpt with two wheels to glue on. I like this because fiddling around with lots of parts on 12 small guns (6 German and 6 French) doesn't sound like my idea of fun. They should paint up quite nicely.

A German unit
Finally here is a German platoon that I based up just to see how they fit together. They are on standard sized Flames of War MDF bases that I bought from Sarissa Precision. In Flames of War this is a platoon, but I'm looking calling it a 'unit' - which could be a platoon, company or a battalion depending on how people want to see it. In my mind it is a battalion. That makes having an artillery battery in support make sense.

I'm looking forward to painting some trial figures once I've got the next part of Geoff's commission out of the way - the Samurai and peasants are about 1/3 finished.

Nate 

Samurai Commission

$
0
0
The latest figures that I've painted for Geoff are these Samurai and civilians from Perry miniatures. I have to admit that I was a bit flummoxed when it comes to the colours of Japanese clothing, so it required a bit of internet searching and a bit of imagination. Without any further ado, here they are.
The Samurai themselves in everyday clothes.
Three women and a monk (?). I took his colours from the Perry site as i'm not sure what he is. I thought he might have a flower in his hand so I painted it red, but if anyone has a better guess I'm willing to repaint it.
The peasants - an old man and three labourers.
I don't know if they came out as pretty as I expected them to in terms of the time that I put in, but I did enjoy painting them. Oriental flesh was something new for me, but I think it looks OK, and suitably different from my normal caucasian skin tones. I hope Geoff likes them. I still have the apocalypse survivors to paint, which I'll get stuck into as soon as I paint a trial stand of WWI Germans.

Nate


WWI 1914 German test elements

$
0
0
I wanted to do a test paint on the Lancashire Games figures in between jobs for Geoff. I did these guys up last night to test colours and how well they would paint up. I have to say that I'm happy with the final result. The colours I used were those provided by Mark Hargreaves from his blog 'Over Open Sights' - he has painting guides available upon request.. As always, by the time you switch on macros and go for the fine detail 18mm figures lose some of that effect that they have from three feet, but they still look alright.

Advancing and firing figures
And from a slightly different angle - the photo makes them look more blue-grey than they really are.
Marching figures
And again from a slightly different angle.
It will probably cost me a fortune, but I'd like all of my 1914 bases to have summer flowers because I really thin kthey bring that August and September in the north of France to life.
The figures themselves paint up very easily and have just the right level of detail. There are incised lines on the cuffs which you can follow to paint in the red piping.
OK, the next week is going to be a bit messy - I have 70 junior exams to mark, their reports to write and Year 12s to prepare for their Classical Studies examination on Friday. Then I have the last of the figures that I'm painting for Geoff - some Hasslefree Apocalypse survivors - and then I need to finish my secret project. Then and only then, will I get into finishing the Crimean War project. After that will be the 1914 WWI. No plans beyond that though, as I'm notoriously fickle, and I have a hankering to get that ECW 28mm project underway. I will also fit a couple of test-paint elements of WWI French in there somewhere as they will only take one session to do, and I'm always more motivated when I have some painted figures to add to, rather than starting from scratch.

Nate

Am I so excited...

$
0
0
... that I want to squeal like a little girl?

Yes.

Nate

Apocalypse survivors

$
0
0
The last of my commission for Geoff are eleven Apocalypse survivors (including two who didn't survive). Mostly Hasslefree figures with a Copplestone Castings Werewolf hunter.
The whole group of figures.
Hasslefree figures channeling 'Shaun of the Dead'
A couple of the boys in blue
'Zombies! I'll get my katana!'
'Cool. I'll get my chainsaw!'

'We can't both be Kate Beckinsale - put some red leather on and dye your hair!'
'I think they got us...'
 Sorry if some of the pictures are a bit blurry.I'm still experimenting with the macros setting on my camera.

Nate

The Battle of Bugaroff

$
0
0
I have friends... honest! And they like to play wargames. But we only get together once or twice a month which limits the number of games we play. It also seems that when we do meet, the game played is invariably Flames of War, although I've got a few games of SAGA in this year as well.
So with my latest little project, the Crimean War in 15mm, I have to go solo. This isn't as sad as it sounds. Gaming solo can be every bit as enjoyable as a face to face game, and only the cat looks at you funny when you make booming cannon sounds. And despite acting for both sides, so long as you have a good scenario and systems, games can be as tense and rewarding as playing against a real opponent.

So yesterday, to celebrate finally finishing the school year (ignoring the quick trip I had to make in today to tidy up some issues) I came home and played a game with what I have painted so far - 4 battalions of infantry a side.

The game is set during the siege of Sevastopol, on the allied cordon facing north to deter any attacks by a Russian relieving force. It is really just a large scale raid by the Russians, but with the aim of driving the British off the ridges that dominate the crossing at the river Bugaroff. The river itself is fictional, of course, but modelled on the Tchernaya.

The British have piquets from the 9th Norfolk and 63rd Suffolk regiments overlooking the Bugaroff river. On the next ridge south the rest of the 9th are in bivouac. Further south, over the hill is the brigade camp containing the Coldstream guards, Gordon Highlanders and the rest of the Suffolk regiment commanded by that redoubtable veteran of the Peninsular War, Sir Hew Fotheringay-Buttpimple. Crossing the bridge are four battalions belonging to the St Petersburg and Brest Litovsk regiments. It is foggy and although these regiments are running to time, the second brigade and artillery support has not yet arrived. General Aleksandr Verdlunchko, a thrusting, dynamic and utterly mad commander has decided to begin the attack anyway.

The Russian objective is to clear the first ridge-line and establish themselves on the road running through the saddle on the hills where the Norfolks are bivouacking by the end of the game. The British objective is to prevent the Russians from gaining a foothold on those same hills.

The Russian battalions cross the Bugaroff.
The British piquets guard the road from behind cover on the ridges
A bird's eye view of the battlefield with the location of the figures and the various objectives.
The view from the ridge line as the Russians come into view.
Battle is joined. The St Petersburg regiment deploys and moves to drive in the piquets.
The Russians find the terrain slow going and the British exact a hefty toll while their enemies toil up the steep ridges
As the piquets are driven off the ridge the Brest Litovsk regiment marches along the road
As the St Petersburg regiments continue their frustrating chase of the piquets, the Brest Litovsk deploys into attack column.
The Norfolks have been alerted to the attack and are deploying on the ridge, about to be faced by the Brest Litovsk regiment.
Sir Hew is aware of the attack now, and leads his column out of the camp to the rescue of the Norfolks.
The Norfolks unleash a devastating volley. 3 shots, three hits, three kills!
Depleted but undaunted, the Brest Litovsk regiment climbs the ridge in the face of the inferno of British rifle fire.
Another devastating volley as the Russians charge in! Although reduced to two elements, they started their charge with three and are thus able to get to grips.
The Russians are only human, and they are repulsed by the thin red line.
The British reinforcements arrive and begin to deploy.
But the Russians only know one way, and that is forward.
The piquets fall back and join the Suffolks, bringing them up to strength. The Norfolks finish off the Russians in front of them.
The Brest Litovsk regiment charges into the newly formed Suffolks and forces them to retreat, staggered! Sir Hew is caught up in the rout! He rolls a 1 - he's out of action! He rolls another 1 - it is a glorious death for the old chap! 
The Russians are on the ridge. But with their low strength what can they do? The Norfolks have turned to pour volley fire into the flank of the Brest Litovsk regiment, and the Gordons have deployed to knock out the remainder of the St Petersburg battalion.
The remaining Russians pour fire into the Suffolks. They rout!
Watch them run! It is our moment of victory tovarich!
It is a short lived triumph. The Norfolks charge the flank of the Brest Litovsk regiment, leaving only the depleted men of the St Petersburg regiment left on the hill. 
The Russians are heavily outnumbered and cut off. It is the end for them.
Although the Russians lost their brigade, the game was a draw. The British couldn't keep the Russians off the hill, and the Russians never got to the gap.
The game took two hours and was played using my amended version of Neil Thomas' 19th Century Wargaming rules. 
I was really impressed with the way that the piquets were able to hold the Russians up with the use of the terrain and by falling back just outside of charge distance. At the start of the game I read the wrong column, and so their fire was more effective than it should have been (they were hitting on a 3+ rather than a 4+), but this didn't take away from from some excellent rolling.
The Russians tried to stop and fire a couple of times, but this was not particularly effective. In hindsight, they should have simply pressed on as fast as they could pushing the piquets back to the ridge.
The Russians were right up against it in this scenario, and could have done with another two battalions or so. They were lucky that the Brits rolled poorly for communication so that it took the maximum three turns to activate the Norfolks and then another three turns before Sir Hew and the British camp woke up.
The highlight of the game was the death of Sir Hew (sorry Ms Fotheringay-Buttpimple). It was at one of the most dramatic moments in the game, and had the Russians had another unit to exploit the collapse of the Suffolks, it may have been a decisive turning point.
In terms of historiocity, the Russian desire to get to grips with the enemy and the effectiveness of the British fire all seemed to square pretty nicely with what actually happened in the Crimean War. I've got another Russian battalion and some skirmishers on the painting tray, so I'm looking forward to getting them into the fray for next time.

Nate


One Hour Wargames

$
0
0
I downloaded Neil Thomas' latest book last night. I'd read some positive reviews, and I have really enjoyed his other books. This latest offering is designed for people who are short on time and space to play wargames. Neil goes through many different historical periods and narrows each down into 4 different troop types. The rules are very straight forward and will be easy to remember in a game. I doubt that I would use them 'as is' but the four troop types work well with my next venture, more of which below.
Recommended
Where this book is worth the price as far as I'm concerned, is in the 30 scenarios and army selector that it contains. Each of the scenarios are well thought out and would work together well as a narrative campaign. Some borrow from other wargamers such as Charles Grant and Donald Featherstone, while others are based on historical situations. Neil's debt to and love of these 'old school' wargames doyens is obvious, and his approach to wargaming reflects those pioneers well.
I'm thinking that I'll try and get a few more Crimean games in using the scenarios in this book - I just need to get some artillery and cavalry painted so that I can use the force selector the way it was intended.

While on the subject of solo wargaming, I thought I'd mention a book that has proven inspirational and indispensable to me in that respect. This is the Military Modelling guide to Solo Wargaming by Stuart Asquith.
I borrowed this photo as it was easier than taking my own and uploading it. Same book though!
I have huge respect for Stuart Asquith. I rate Practical Wargamer as the best wargames magazine ever published, and the bar by which I measure all others. Today, in my estimation, only Wargames, Soldiers and Strategy comes close, and historically only the early issues of Battlegames equaled it (coincidentally Stuart wrote columns in those magazines).
Solo Wargaming is 125 pages chock full of ideas and scenarios for the solo player. Some of these are not as fully developed as one would like, but they provide some great starting points. I'm sure that Featherstone's Solo Wargaming and C S Grant's Programmed Wargames Scenarios are also excellent tomes that would complement this one, but unfortunately I don't own them. I noticed that Don's work is reproduced by John Curry, so I might have to acquire that one. I don't know for sure, but I think that the Partizan Press Guide to Solo Wargaming by Stuart Asquith is essentially the same book, which makes it available new from Caliver Books for those that want to peruse it.

What shall we use to fill those empty spaces? *

I have a space in my cabinet beside the 15mm Punic Wars unpainted lead and just above the 15mm Napoleonics unpainted lead. I've been wondering what unpainted lead should be used to fill this space. I considered 15mm Marlburians and the Austro-Prussian War as candidates. But I already have the Crimean War for mid-19th Century and WWI for picklehauben. And I've already done 15mm Marlburian once and discovered that unless I have 50 units a side I can't capture the feel that I want for that period. The space in my cabinet is not that big. Seven Years War? Too close to Napoleonics, which I've already got. Then it struck me. The Great Northern War. The pikes make it different to the other horse and musket games I play. Charles XII and Peter the Great are fascinating characters. Tricornes and big cuffs! I'm sold. So I've made an initial order with Ian Kay at Irregular Miniatures, and I'm really looking forward to them.
I figure I'll adapt Neil Thomas' Napoleonic rules. They will need quite a bit of adaptation, but in a very simple way. There are four basic troop types - cavalry, artillery, infantry (both armed the same) and dragoons who frequently dismounted to fight. The Swedes need attacking bonuses to represent the success of the 'ga pa' charge and the effectiveness of their cavalry. I'll have a play around and see what I come up with.

*apologies to Roger Waters.

Nate


Something Moor for Christmas

$
0
0
Finally revealed is my 'secret project' for Christmas. I've been painting a 4 point Crescent and Cross warband of Moors for Dan and Marcus. It arrived two days ago, so I can now reveal them in all their glory on this blog.
The whole 4 points Almoravid force
Archers with cavalry behind
The Black Guard with another cavalry unit behind
For some reason I didn't take a close up photo of the Warlord, which is a pity because I was particularly proud of him.

Now, back to the 15mm Crimean War project - cavalry and artillery time.

Nate

Found the Warlord!

$
0
0
I did have a picture of the Warlord in close up. Here it is.

Nate

Building on the World War Two project

$
0
0
I had to order some bases recently, and when looking at Sarissa Precision's website I noticed that they did a range of MDF buildings for NW Europe for 10-12 pounds. This wasn't of much use to me, as my Bolt Action armies are designed for Italy and Russia. But at second glance I fancied that I could make them work in an Italian setting. So I ordered two buildings. here is the first that I've painted up. It is quite orange-red looking, but will be in a town full of more yellowy coloured buildings. 

New Zealand troops cautiously move around the corner of the building.
Now in occupation of the first floor. 'Say, this place is awfully clean for a building that's been hit by artillery!'
Another view with more from the front visible.
I scored and painted some corrugated cardboard and glued it onto the roof to give the impression of tiles. The side that isn't in the photos actually worked much better.
This building does look pretty clean, but when I've completed all of the buildings for the village I'll add in rubble, dust and drybrushed scorch marks to get a bit more realistic effect.

Nate

Public Health Warning

$
0
0
When clearing nozzles of spray cans, point can away from self.
That's right, Soviet Armour - I'm looking at you!
Half an hour of soaking my head in the sink and applying cold compresses to the eyes and they still sting like buggery!
Got it working again though...

Nate

House amendments to Neil Thomas rules

$
0
0
As I've mentioned on this blog many times, I like the simplicity of Neil Thomas' rules. They are well thought out and give a good game. But I'm not quite so sold on his morale rules as they stand. Basically, if you lose an element to shooting or lose a hand to hand combat you must test morale. If you fail, then you lose another element. This has the effect of whittling away your unit as a visual means of communicating combat effectiveness. I, however, like my units to remain intact so that there is a chance that they can rally and play a further part in the battle, while declining numbers increase the liklihood of failing a morale test. So here are my house rules for morale which can replace the morale system as a plug-in.

Morale Tests
1.    Testing morale. A unit must test morale under the following circumstances:
1.    It has to retreat after hand-to-hand combat.
2.    A base has been removed from the unit this turn, as a result of enemy fire.
2.    Moraleprocedure. Roll a die and consult the table below.
Troops Type
4 elements
3 elements
2 elements
1 element
Elite
2-6
3-6
4-6
5,6
Average
3-6
4-6
5-6
6
Levy
4-6
5-6
6
7
Rabble
5-6
6
7
impossible
3.    If the unit fails to achieve the score required, it becomes staggered. This means that it may not advance towards the enemy.
4.    If a staggered unit fails to achieve the score required it will rout. This means that it will continue to move towards its table edge at full speed until rallied. Carry this out as soon as the test is resolved.
5.    If it is impossible to make a morale test the unit is removed from the table.
6.    Artillery always roll as if they are 4 elements.

7.    A 7 is achievable if the unit has a general attached

This involves two stages of morale degradation - staggered and routing. It also allows for a general to join the unit to rally it from either state. The general rules that I use are as follows:

Generals
Generals and morale. If a unit is accompanied by a General, it may add +1 to all morale test die rolls.
Generals and combat. Generals may attach themselves to a unit. From that point until they move away they act as part of that unit. They add an additional dice to combat. Use a different coloured dice. If the general rolls a ‘1’ then they are knocked out of the game. Roll another dice. On a 1-2 they are dead, 3-4 they are wounded, 5-6 they are captured.

Generals and movement. Generals may detach from units and move at 30cm per turn. To attach to a unit the general must be in base to base contact.

The Generals in combat rule is a little bit extra for narrative campaigns, and played a part in the last Crimean War battle that I posted.
Please feel free to try them and decide whether they work for you. They seemed to do a good job in their last outing, but then the Russians rolled some pretty impressive numbers - not so much the Suffolk regiment.

Nate

PS Thanks for all the comments regarding my spray can mishap yesterday. My eyes are fine today, so we'll just leave that Darwin awards moment in the past.

Looking at 2015

$
0
0
Back from the beach and a very relaxing holiday. The weather was perfect and the sea was warm. Whilst away I had plenty of time to reflect on my wargaming plans for this year. One thing that I kept coming back to was my general gaming philosophy - games must be fun with rules that are easy to use and don't take all day to play to a conclusion. For this reason I am coming back to DBA style games. I don't have DBA 3.0 yet, and it is apparently unavailable until later this month, so I'll order it in February.
The other rules that I'll be using will be based on Neil Thomas' wargaming rules. I've made no secret of how much I enjoy these rules and my last post was about an alternative morale system that I've found works well. I've put together adaptations of the rules specifically for the Crimea and Great Northern War and will be playtesting these this year.

So what have I got lined up?
If I can stay on track, this year I want to do two larger 15mm projects - the Great Northern War and 1914 Western Front. Interspersed with that will be two 15mm DBA projects - the Punic Wars and Sengoku Samurai (using Humberside extensions). My final plan this year is to finish of my 28mm Gallic Wars Romans and Gauls. The idea here is to use Lion Rampant by Dan Mersey, and I've already started playing with the points to build 12 figure Legionary units with pila. As the theme behind their use will be the occupation of Gaul and the Gallic resistance, I think this skirmish set will work very well indeed.

Coming this year: Letting the Blue Boys loose against those pesky Russians
In terms of games to be played, I'm really pleased to have finished my Crimean War project this week, and have the table set up for a solo game tonight. I'm also keen to get more Star Wars played this year, what with the excitement of Episode VII and the really good Star Wars Rebels cartoon series to keep me inspired.

Ready to go: Letting the Red Boys loose against those pesky Russians
And not forgetting commissions - Geoff has sent me some more figures to paint, and a dozen are currently sitting on my painting tray, undercoated and ready for the paintbrush. Some of them involve a well known canine and his four friends.

Sitting in the cabinet, but unlikely to get worked on this year are 28mm Bolt Action WW2 and 15mm Peninsular War (again using an adaptation of Neil's rules). I've also got a Zulu War 15mm Hordes of the Empire project sitting there which shouldn't be too much work.
In terms of purchases I want to get 15mm figures for Dux Bellorum - prpreferably with shields attached and available as single figures. And after that? I have a real desire to play some of the less popular periods that I enjoy, even if just to paint up the figures. These include (with likely source):
The Russo-Polish War 1919-21 (Peter Pig)
The Taiping Rebellion (Irregular)
Aztecs and Conquistadores (Black Hat)
The War of the Triple Alliance (QRF/Freikorps)
The War of the Pacific (Chile, Peru and Bolivia) (Outpost)
The Chaco War (Irregular)
The Sikh Wars (Black Hat)
Each of these would be a DBA style game so that I don't have to invest in excessive amounts of lead.
I also want to get 1914 Russians from Lancashire Games at some point, but this would be on the same scale as the German and French 1914 armies.Last on the list is the German-Danish War of 1864 from Rank and File/Old Glory)

So grandiose plans (let's see if I can stick to them) and a long want list. But I am happy in my madness.

Nate

The Ford on the Bugaroff Part One

$
0
0
Sir Hew Fotheringay-Buttpimple had been dispatched to destroy the bridge over the Bugaroff river and seal off the possibility of a flank attack by Russian forces designed to cut off the Allied lines from Balaklava. Unfortunately his dithering had led to a hard fought skirmish against the Russians before the bridge was able to be destroyed (battle report here). In the end the Russians were repulsed and Sir Hew died heroically at the moment of victory. Of course this did not stop the rumours circulating of how close the whole enterprise had come to disaster.
Although the bridge was destroyed, a ford further up the Bugaroff valley offered another possible avenue for a Russian turning movement. Lord Raglan took the possibility of a Russian push in this area very seriously, and sent General Sir Lancelot Stark-Raven to secure the crossing. Sir Lancelot took control of the 9th and 63rd and was given a battalion of the Rifle Brigade and an artillery battery to reinforce him. He quickly built two redoubts covering the ford, and established his camp on the next ridge back from the crossing. Not far away the camp of the Guards Brigade was set up, and beyond that the Light Brigade and the main British lines.
A month passed and Stark-Raven's Brigade kept a dedicated watch on the crossing, skirmishing with Russian jagers on a relatively regular basis.
Then, one Tuesday morning while the Rifle Brigade was on picket duty, something more than a few jagers was on the far bank of the Bugaroff. It was General Pavel Onegin-Offagin and his Caucasus Brigade, supported by 2 batteries of artillery.
The Russians were coming!

A bird's eye view of the battlefield, showing the position of the two redoubts and the camp of the Anglian Regiments
The British artillery in their redoubt
Another shot showing the objective flag
The Rifles moved to the bank of the river in order to skirmish with the Russians as they crossed.
The Caucasian Jagers begin to skirmish forward, supported by artillery
The view from the redoubt occupied by the Rifle Brigade's supports
Commander of the Russian attack General Ivan Gotanich oversees the operation.
Aleksander Verdlunchko leads his reserve brigade up in support of the attack.
Onegin-Offagin supervises the jagers as the Caucasus regiment marches along the road.
The rifles begin to take casualties from long range fire.
The Russians move forward.
The jagers skirmish across the Bugaroff ford.
Screening the Russian column comes at a cost. Luckily the stubborn rule keeps them in the fight.
Stark-Raven gets his Brigade moving.
A long range perspective on the battle.
The jagers continue to suffer as the main body of the Russians cross the ford. They are sensible enough to focus on the Rifles and stay away from the canister firing artillery in the redoubt!
'Help is coming boys - Hold On!'
The first battalion of Russian infantry is across.
It's a race - will the Brtish get there in time?
Onegin-Offagin leads his 1st battalion towards the assault.
Rolling a 6 for morale and the jagers are still in the fight!
Bottleneck at the ford as the reserve brigade catches up to the advance guard.
In a brave and daring charge the Russians charge the redoubt and destroy the artillery. Too late the 9th reaches the ridge crest.
The Russians continue to cross the river.
Now occupying the redoubt the Russians are subjected to a volley by the 9th.
The 63rd unleashes a volley and the Rifles stand their ground. Now is the time for the British counter-attack.
The Russian cavalry begins to arrive.
Shock! Horror! The Norfolks are repulsed! The 1st Caucasus hold the redoubt, despite heavy casualties and being staggered.
The brave jagers withdraw from the battle to allow Verdlunchko's battalions to deploy. The Rifle Brigade's fire is disappointing to say the least. They should have withdrawn, but stay to fight it out.
The Dniestr and St Petersburg regiments charge the rifles who are savagely beaten and forced to withdraw. The 2nd Caucasus battalion charges and defeats the 63rd, staggering them. Things are not looking good for the British.
The British continue to withdraw towards the camp ridge. They don't have the strength to retake the redoubts - they need to hold on until reinforcements arrive.
And here they come! The Guards Brigade under Sir George Paddington-Beere begin to arrive.
The cavalry continue to advance
The British line begins to form.
The Russians begin to reorganise for the next push. The Caucasus Brigade will hold the redoubt ridge line while Verdlunchko's troops lead the next assault.
The cavalry reach the Bugaroff.
And that is where we leave part one of the battle, with the Russians firmly in control of their first objective. The timidity of the two Anglian regiments was represented by some shocking dice in combat and in morale. Despite two attempts to rally the staggered 63rd, they remain in their shaken state. This must represent the effects of the mauling that they got in the battle at the bridge. On the other hand the Russians have benefited from being stubborn and from rolling 6s for their morale.
It would be tempting for Gotanich to send forward Verdlunchko's Brigade now, but the British reinforcements make that a dubious move. I'd say that he will wait for the cavalry at least before making an assault on the next ridge-line. But he is well back at the moment in the middle of the reserve column. Will the impetuous Verdlunchko take things into his own hands? We will find out in part two.

Nate

Viewing all 492 articles
Browse latest View live